I was thinking a mural of the Roebling Road tower on the hood would look really nice as well.
The New Ranger 6 Build Thread
Scott, I almost never read “build threads”, but I’ve been enjoying reading yours! Thanks for taking the time to bring us along on the journey because it’s very comforting to know that we’re not the ones having to go through it! 
Another big weekend. After mulling the issue over for a couple days I decided that to move the rear end from Old#6 to New#6.
I checked the alignment on New#6. Well…first what I did is take my camber gauge apart, replace an adjuster doo-hicky, and put it back together. Then I re-calibrated it. Which is to say that it will be a while before I can trust my camber gauge again. So with my untrsted camber gauge I measured my alignment and was surprised to find that my rear camber wasn’t too bad and I had too much front neg camber. Knowing full-well that it’s damned unlikely that I had too much front camber, I decided that my camber gauge must be way goofed. Which sucks because I’ve grown to depend on it.
So, my guesstimate of the situation was that I didn’t have enough rear camber. Certainly if there was ever a time to swap out rear suspensions, now was it. New#6 did not have adjustable rtabs, so there was no adjusting it, period. And I positively knew that would eat at me.
The rear end on Old#6 has the weld-on toe/camber kit, the trailing arms are reinforced for the 19mm sway, it has newish halfshafts, wheel bearings and studs, and it has aluminum diff and subframe bushings.
Saturday I pulled the rear end off of Old#6.
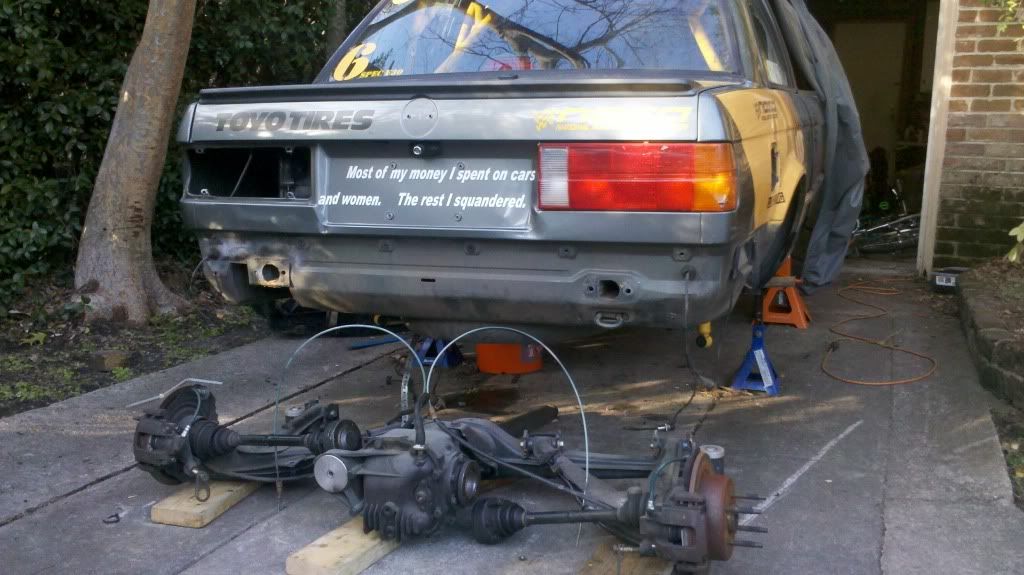
Note the George Best “Most of my money I spent on cars and women. The rest I squandered”…quote.
Today I pulled the rear end off of New#6. Well, first I tested the LSD brake torque on the diff, and then I pulled the rear end off. Then I dragged it out of the back garage and wrapped it in a tarp. It’s going to sit there for a while.
Anyone want a cherry diff? 50ftlbs LSD breakaway.
I noticed once I got the rear end off of New#6 that it had serviceable OEM rtab bushings and thrashed OEM subframe bushings. Swapping rear ends was the right thig to do.
n
Me and a neighbor, husband of cute Glock chick, hefted Old#6’s rear end into my truck. Was pretty damned heavy. Then I drove it around to the back garage, the home of New#6. We wrestled the rear end out of the truck and put it into position under New #6.
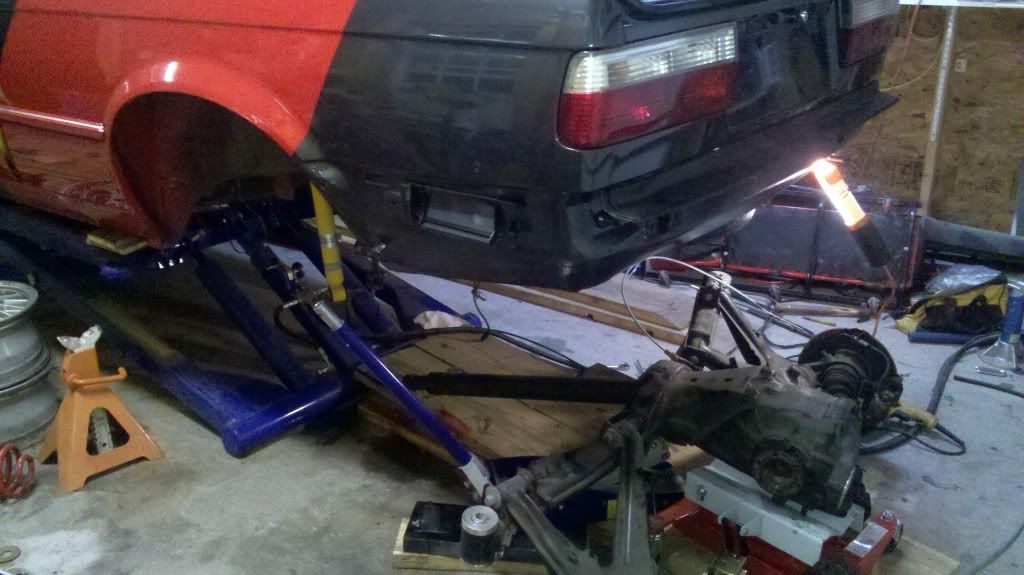
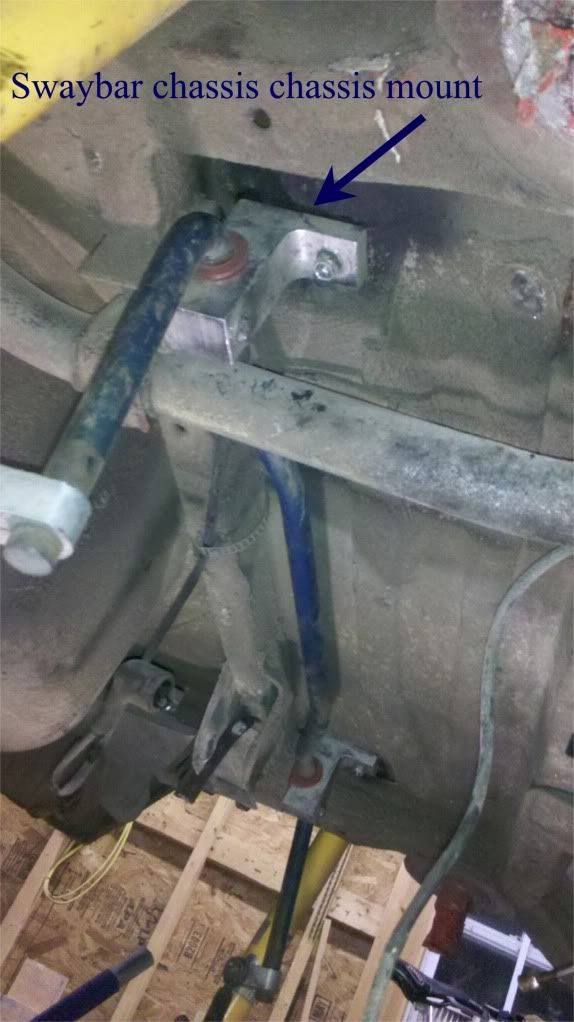
The last effort tonight was to swap the rear sway from Old to New#6. That also meant installing the aluminum reinforcing blocks that bolt in under the trunk.
 ]
]
[quote=“Ranger” post=63222]
Anyone want a cherry diff? 50ftlbs LSD breakaway.[/quote]
I could be interested. The daily driver has a bit of a whine that sounds like diff gears.
Congrats on the progress. Looking good.
Eye protection is good.
But first let me bring the thread up to date. Monday I got the rear end up into place and loose fastened at the subframe mounts and diff. Getting the heavy-arse beast up at just the right angle so the driveshaft would go into the tunnel and the two subframe ends would get into place was difficult as usual.
Next time I will have to do this differently. All it would have took is a bit of bad luck and the subframe would have put weight on the driveshaft which would have broke the pipe between the gas tanks and I’d a had 10gal of gas on the garage floor.
Then I got distracted by my hunt for an E46. I went down to Jacksonville, FL and bought a 2001 330i that needed some love off of a guy for pretty cheap. The next couple of days I accomplished nothing on the SpecE30 because I was obsessed by the 330’s issues. And there were a lot of issues to obsess over. When I test drove the car there’d been no idiot lights illuminated but when I drove it to work it’s dash lit up like a christmas tree and I barely made it home it was missing so badly. Of course I wasnt’ fixing anything, I was just obsessing. There is no spare garage space for the 330i so there was no daylight and no parts. So I did a bunch of research and spent lots of money on the 330i to buy maintenance items that should have been replaced at 100k mi. by the PO. Every dollar I spent made the “I can probably upgrade the DD from e36 to e46 for not much money” scheme sound like a pipe dream.
I finally forced myself to break emotional contact with the 330i last night and redirect attention to the SpecE30. I fastened up drive shaft, half shafts, and the shocks. One of the shocks was a miserable bast**d and cost me 45min of my youth until the bolt finally lined up.
Then I did some welding on the cage. I needed a piece that would lift the shoulder straps because I hate it when shoulder straps tilt down. While I was welding that piece on I manage to rip the plate that holds the kill switch right off the cage. I’d noted before that it had been fastened to the cage by the only example of welding worse than mine I’d ever seen. So I welded that back on too.
Today, the first bit of daylight with the 330i was mostly devoted to rescuing it’s paint and glass surfaces from a decade’s neglect in the form of water spots. A circular buffer, not dual action, a wool pad and rubbing compound, is not for the faint of heart.
Once darkness fell I went back into New#6’s garage. This evening’s mission was to hook up the remote oil pressure manifold, get wheel studs into the RF hub, put the brake caliper on and then fill and bleed the brake hydraulics. Here’s where it got interesting.
I never was all that disciplined about eye protection. But a couple yrs ago, call it age 47, I started having to use reading glasses. Was quite a blow to the ego. I usually wear the reading glasses when I’m working on the car because I find that it is often necessary to see what I’m doing. As a result, I always have eye protection, of a sort, now.
To bleed my brakes I put hoses bleed bottles on each corner, put a liter of fluid into the pressure jug, fastened it on to the brake fluid reservior and pumped it up, and then opened the speed bleeders at each corner. This works a lot better than asking my wife to help. A lot better.
So the bleed effort seemed to be going ok, altho I’d have to say that 4yr old bleeders don’t seem to work all that well, when I noticed that the tube from the pressure jug was kinked. So I adjust the position of the jug so that the tube will unkink and suddenly a jet of Superblue sprays me in the face.
Superblue tastes lousy. But my reading glasses kept the stuff out of my eyes.
Pre-reading glasses there’s no way I’d a been wearing eye protection to bleed the brakes. Let this be a lesson to those of you that can actually choose whether or not to wear glasses when working on the car.
Air dam, rear deck, rear passenger windows, dead pedal and dashboard
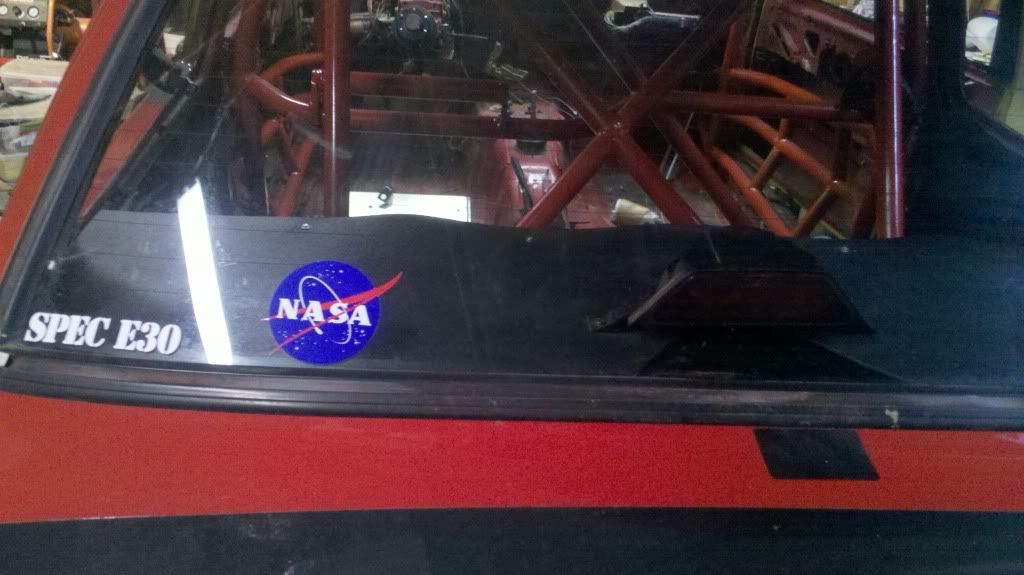
The first set of decals arrived. Some of my ideas didn’t work out so there’s some redo’s, but it’s starting to look like a race car. The <----MOVE OVER that goes on the front windshield just isn’t visible enough in red so that’s #1 on the redo list. The pics give a good idea as to the ultimate look tho.
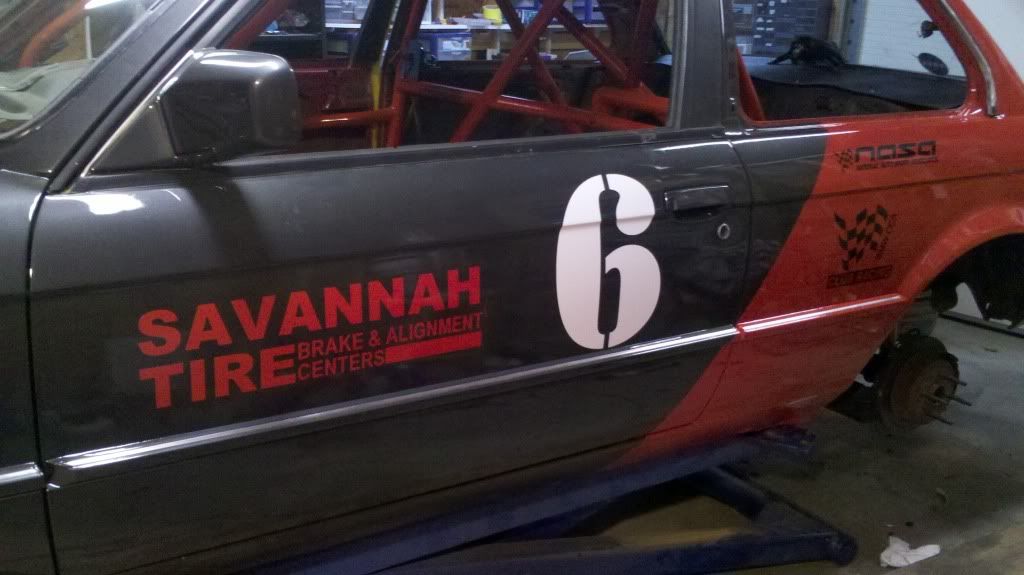

It took a couple days to get the air dam on. The clever way to do this on an early e30 is to build a “shelf” of sorts under the bumper to hold the air dam up, and then use zip ties to hold it in place. The trick is to imagineer a solution which holds the air dam securely, but not so securely that it will bust up if knocked off. Early e30 air dams are getting harder to find so if yours gets knocked off you want it to end up track-side intact, not in splinters. To my irritation it took 3 iterations of locating the 3 “shelf” pieces under the bumper before the air dam was in the right place. For 2 nights I was covered in aluminum tailings from drilling all the holes up into the underside of the bumper. Pressing the drill up into the thick aluminum bumper hard so the bit would bite deep for hole after hole eventually wore me plumb out. Of course due to my cleverness some of the holes were in the reinforced section of the aluminum by the shocks so were double-thickness. I can usually be depended upon to find the hardest way to do anything.
Finally, I had to cut some sheetmetal off of the front valence to clear the brake cooling inlets. That, boys and girls, is an e30 early model bumper and air dam on a car that used to have late model bumpers and valence.
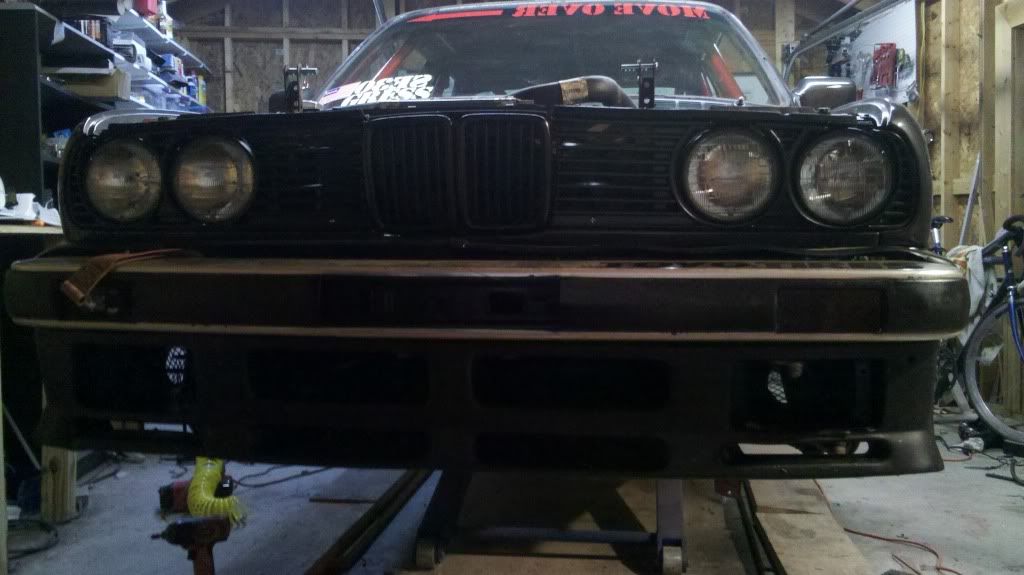
The final success of interest was last night’s effort on the back deck. Once it’s stripped, the E30 back deck looks pretty awful. The sheet of ABS and the 3rd brake light are from Old#6, may it RIP.
Struggles.
Getting the rear passenger windows installed last night was a fail. My cage is not cleverly done. The PO had some expert aviation welder do the cage from a kit. The welds are fine but some of the tube positioning is problematic. The tubes at the B pillars were kicking my butt last night because they were preventing me from getting little nuts on to the window molding that holds the front of the windows down. For the millionth time I thought of the charms of a sedan instead of a coupe.
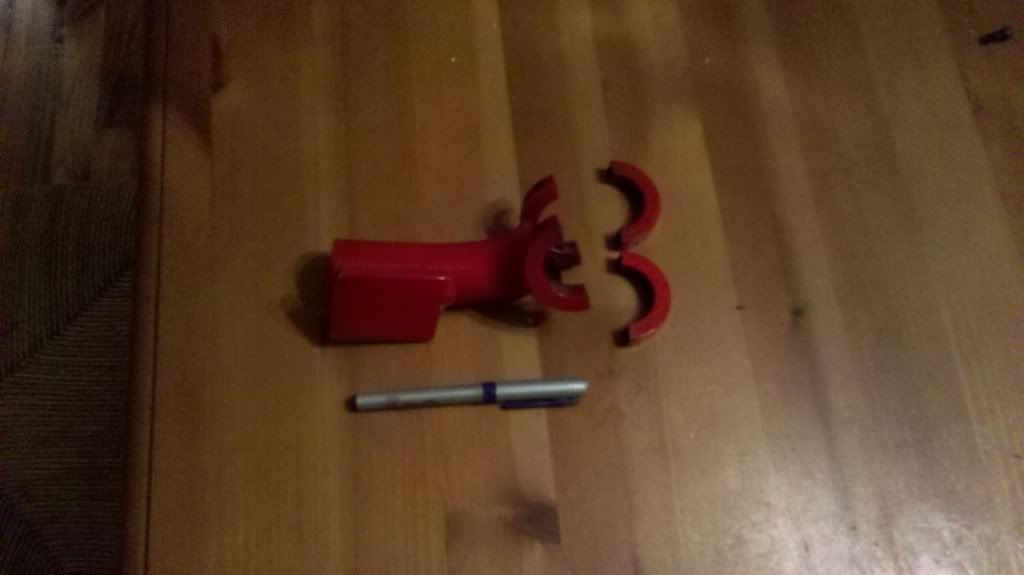
Getting the dead pedal installed on the cage last night was a fail for lack of two 1/4" fine thread hex bolts. I’ve lots of carefully organized metric bolts but not so much USCS (United States Customary System). I looked all over the damned place for the half dozen of those bolts that I knew were around somewhere, but I couldn’t find the SOBs. This afternoon I picked them up from a local hardware store.
Getting the dash back on didn’t go so well. After working quite a while to get the hidden center fastening, it’s well forward next to the windshield, to fasten up, I decided that the dash needed to be cut a bit more to give the cage more room. Otherwise I could spend all night shoving the dash forward and the damned fastener wasn’t going to pop in. The dash got a reprive tho because by the time I figured out that I need to do some cutting it was past midnight and the later it gets the more risk I run with power tools.
Tonight I’m going to pressure wash the dash, then put the brake cooling ducts on. Then the wheels go on, the car comes down off of the lift. Cut the dash and get it in place, then crawl into the back of the car and entwined about the cage, make another attempt to thread the bolts on that hold the rear passenger windows in place.
I had the same problem with the side window hinge nuts. The main hoop is just a bit too far forward. I was able to get the nuts on by using a spring-type flex driver. Care and a gentle touch was needed to get the nut started w/o cross threading it, but it worked.
Brake cooling, dead pedal, dash, windows and coolant pressure switch.
Worked on the car until 2AM last night.
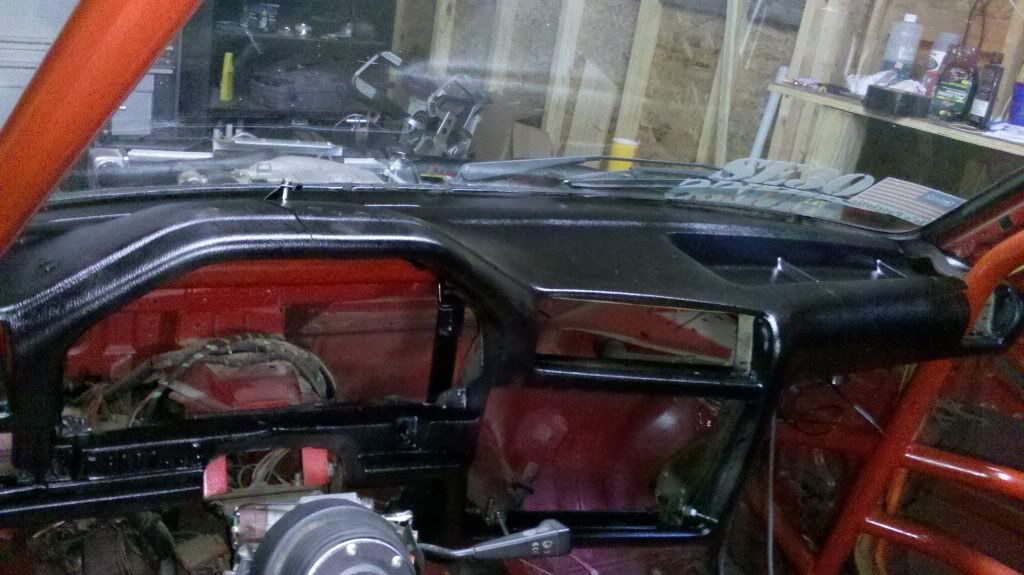
I attempted to clean up the very dirty dash by using a hose and stiff brush but the result still didn’t look very good. There was just too many years of dust imbedded into the texture of the vinyl. So I cleaned it with mineral spirits and gave it a couple coats of semi-gloss black. Then I did some cutting on it to give the cage bars more clearance. I noted with concern that cutting on the dash didn’t do anything for the stiffness of the already flimsy affair. The dashboard’s fastening points are at each end, but there’s huge portions of the dash, just short of the fastening points, cut out to give the cage bars clearance. As a result the dash is structurally not very sound.
The dash also has some serious cracks in it. It may be one of the worst dashboards I’ve seen. I can’t be certain that I’m looking at cracks or if the dash just came out 2nd in a fight with a circular saw.
I left the dash with it’s paint drying and moved on.
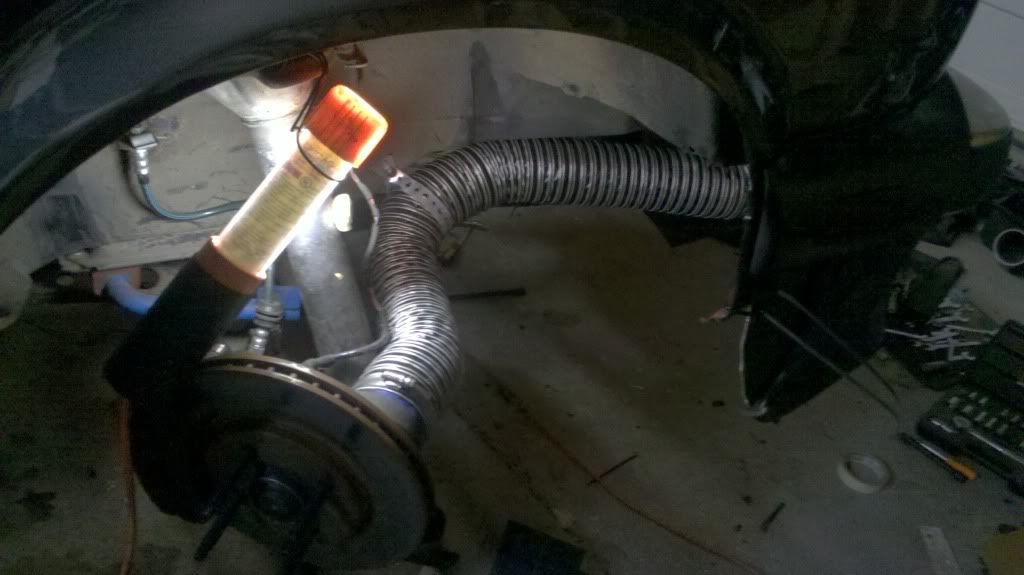
Brake cooling. The brake cooling ducts when on with some struggles. I should have cut more of the valence away, and some goober bent or removed some of the bolts under the frame that are typically used for fastening these ducts. Also, the plastic brake cooling inlets that are fastened to the air dam are pretty busted up. Gorilla tape to the rescue. It would be nice to get a couple more seasons out of the air inlets. And next time I pull the air dam off I need to enlarge the holes in the valence because they aren’t quite giving the air inlets enough room and that’s going to abrade the high temp air ducts.
Some bending of the bolts welded to the undercarriage and some work on the threads with a die gave me fastening points to hold up the air tubing.
Luckily I had a bunch of high temp 3" air tubing that I bought off of Al Taylor last year for a rainy day. The old tubing wasn’t in great shape even before the crash cut it to ribbons.
The dead pedal. With the brake cooling work done I was able to put the wheels on and bring the car down. Then I crawled into the pedal box to install the deadpedal. The bolts used a 1/4" hex and not having a lot of SAE/USCS tools all I had was a pretty long one. It took a long time to fasten the deadpedal’s 4 bolts up, laying upside down, on my head, and turning the over-long hex wrench 60deg at a time.
Back to the dash. What had kicked my butt with the dash was this hidden clip under the center of the dash and way forward. It holds down the front of the dash. When you can get the SOB clipped in, that is. But now that I had given the cage bars a bit more clearance, after 30min of struggle and cussing I had the front clip in as well as all 4 mounting bolts.
I might put some black RTV into the dashboard’s cracks in attempt to make them a bit less “in your face”.
The dashboard really isn’t secured all that well. Its going to vibrate a bit on the track and since the tach will be mounted on the dash, the vibration is going to drive me crazy. I fastened the back of the dash down in a couple places with zip ties and I might do something later to fasten the front of the dash to the transmission tunnel.
The semi-gloss paint turned out a little glossier than expected. Either it’s going to dull down a bit or folks will think I bring Armor-All to the paddock. Next time I’ll try Satin.
Rear Passenger windows. By crawling into the rear of the car I had better access to the window trim bolts obscured by the cage’s B columns. It wasn’t easy getting to those bolts, but I persevered. What had been impossible yesterday became simply “an SOB” when accessed from the rear seat wrapped around cage bars.
I put my old windows on instead of the windows that came with the new car. The downside of using the windows from Old#6 is that they aren’t very clear. When I was grinding at Old#6’s sunroof cassette 6yrs ago a lot of the molten steel shards sprayed at the windows and imbedded themselves therein. Doing dumb things is how you learn. Maybe down the road I’ll put decals on New#6’s windows and swap them in.

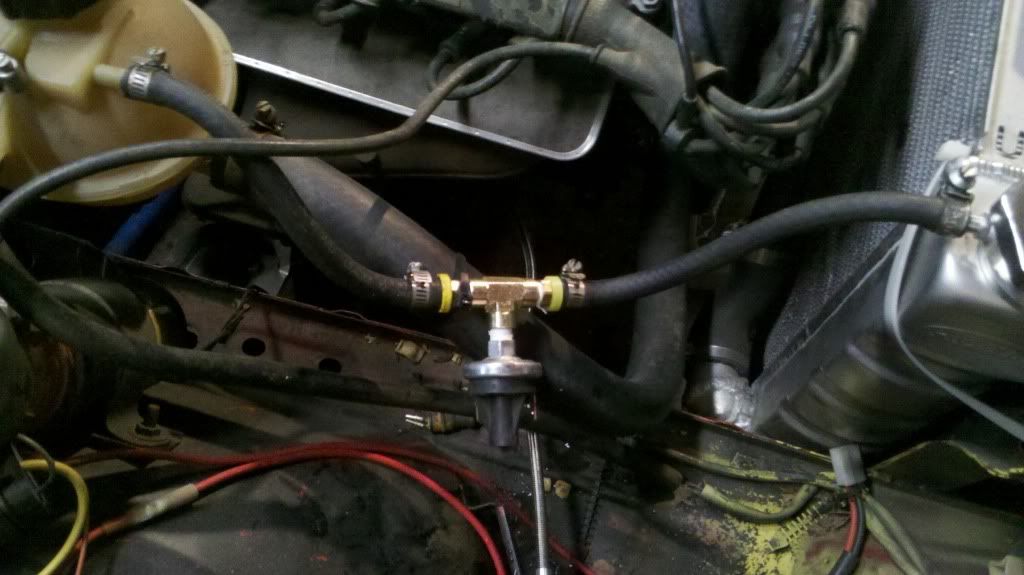
Coolant Pressure switch. Anyone that is racing w/o a coolant pressure switch is asking for trouble. Your temp gauge will generallly not warn you about coolant loss because the hot coolant drops away from your coolant temp sensor and it becomes an air temp sensor. Or, due to coolant loss or pump failure, coolant quits flowing and by the time your sensor registers a significant temp increase your head has melted and your rings have failed. There’s a number of ways to plumb in a pressure switch. On Old#6 I had the pressure switch remoted into the port on the block that normally provides coolant to the throttle body heater, but this time I’m going to use Jim Levie’s idea and plumb it inbetween radiator and overflow reservior.
The big hood decal should be ready Monday. Still need the exhaust parts tho.

The ToDo list is getting shorter.
I can’t tell from the picture whether or not you have a bar under the steering column. If so, just take a piece of 080 steel, drill a hole and tack weld a 6mm nut to the bottom. Then weld to a scrap piece of 1" square or round tubing on one end. Then cut to length and support the dash about 4" from each end, bolting through the top of the dash. Quick, easy, and stable. Chuck
Put the water pressure switch back under the intake manifold…that is the first place pressure will drop because it is the farthest from the water pump. Chuck
What thread is it and where can I get one?[/quote]
The adapter is either 14 or 18mm. I’ve got one sitting on my garage floor right now but I’m hitting the rack and won’t be back on the web until Saturday. Search the forums it’s been discussed before. You just need to get an adapter to 1/8NPT and then get 12-16" of hose so you can remote the pressure switch.
Chuck, I don’t think the coolant failure issue is time sensitive. My guess would be that the drop of pressure, due to some failure in the coolant system, will propagate very fast. Theoretically at the speed of sound in water, whatever that is.
I’m at adapter overload which is why I asked. I can’t think of any more adapters. Why doesn’t the English system just die already.
heres a question I actually want to know the answer to.[/quote]
I attach my air dam to the valence so the valence needs to be reasonably stout. Although a “shelf” under the front bumper carries all the weight of the air dam, there are 4 zip ties across the front of the air dam that pull it back towards the valence, and 2 zip ties at each end of the air dam into the valence holding the air dam ends secure. I figure that the more material I remove from the valence the more fragile the whole affair is going to be.
That being said, I should have removed a bit more material.
Subject change. The thread on the port at the block going to the throttle body is 12mm.
You can take the old hose connection and machine off the hose connection, drill carefully (you can’t go all the way through) and tap 1/8" pipe. That is what I ahve done several times. Or, you can use a bolt and do the same…bolt is stronger.
I understand the cooling system is a pressure vessel and the pressure is the same at all points. However, as long as there is water in the radiator, the pump will move water into the motor…the last part of the motor will loose pressure first. CB


