I got behind on this tale. Between working hard on the car until late at night and then being really busy at work I wasn’t getting any time to sit down and write. The car went to Maaco a week ago. The adventures below are all from 2 weeks ago.
I got in big trouble one night around 11PM for making too much noise. I was using a sander on some bondo. Neighbor called the house and woke up wifey who then stormed into garage spitting fury. The next day, hat in hand, I apologized profusely to neighbor. We than conducted some noise experiments to see what I could and could not do. This was a critical issue for me because Scott-time doesn’t start until the kids go to bed and often goes into the AM. If the tools were too noisy I was going to have to look into putting sound insulation on all 4 walls and the ceiling. But the experiments indicated that the sander, grinder, and even the new air compressor were relatively inaudible to the neighbors and therefore I was good to go. The whole problem was that my garage door had been open that night. And the reason it had been open was to give the noise an outlet pointed directly away from the other neighbor, the one in the Glock story. So I think all I have to do is to keep the door shut and not bang on anything and I’m good. And also, no one gets shot.
The saga of the oil pan.
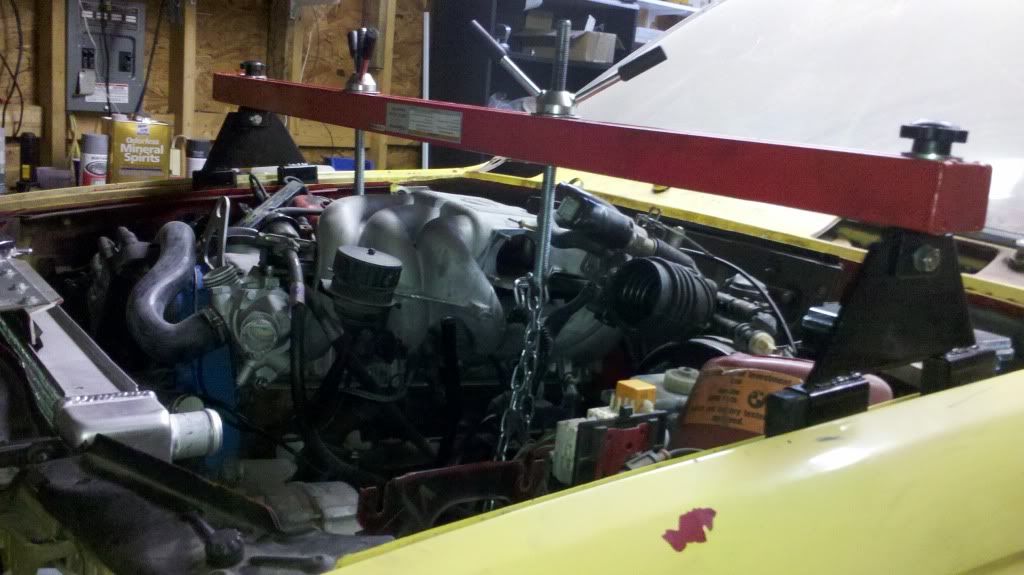
After sucking the oil out of the engine with a vampire, I lifted the motor up with a rail across the fenders (see pic), undid the motor & tranny mounts, removed the 50 bolts that hold the oil pan on, and removed the oil pan. The intent was to install one of my baffled oil pans, a crankscraper and a blue printed oil pump, all of which I have several.
I thought.
Cross bar engine lift.
To my irritation it turned out that none of my 3 backup oil pans had the oil temp bung welded on, nor the baffling that IMO is necessary to keep the oil pump pickup submerged. And clever me, I’d already removed the oil pan on a car that needed to drive on to it’s trailer in 48hrs for the trip to MAACO.
First thing Monday morning I took an oil pan to the aluminum welding shop with a spare bung and a drawing of the little door that needed to be installed in the left side baffle. He told me to come back at the end of the day and we’d do it together. In the afternoon I left work a little early and headed home to try to get the Metric Mechanic baffle out of Old #’6’s oil pan, currently crushed between block and steering box. Rolling around under Old #6, in a big hurry, with grinder and Sawz-all turned out to be a big waste of time. The only thing I accomplished was to erase all the healing that my cracked rib, which took a whack in the crash, had done in the previous month.
My mother was visiting. I walked into the house complaining about my rib with my hand pressed firmly against my rib cage about where the liver is. My mom, who is kind of a nut, said with concern “Are You Having a Heart Attack”? Groaning inwardly at the amazing things that come out of my mother, I said “Damnit mom, quit making me laugh, it hurts like a bastard”.
Frustrated, late and gritting my teeth against the knife in my ribs, I hustled to the welding shop.
We managed to weld one of my spare 1/2NPT bungs to the oil pan easily enough, and after imagineering a number of solutions for the little trap door in the left side baffle, I ended up leaving with a stainless steel door hinge sort of thing. I chose to finish the project on my own because he was doing work I could do and my time is free. Which, of course, is when the problems started.
The first problem was drilling a couple holes in the SS hinge so I could fasten it to the baffle. The SS defeated 4 drill bits before I had 2 holes. 4 bits to make 2 holes. Jeezus.
Oil pan bung, OEM baffle w/ hole cut for door, stainless steel hing.

The second problem was that I’d cleverly had the guy weld the 1/2NPT bung on backwards. It was designed to be inserted into a hole from the inside of the pan and that hadn’t occurred to me. For any other kind of thread it wouldn’t have made any difference but NPT is tapered. That is to say that the threaded hole gets more narrow as you thread in. So I had a bung that was at its most narrow on the outside of the pan and there was no way I was going to be able to thread in the temp sensor’s adapter. Using a 1/2NPT tap I gingerly tapped the bung from the outside, full knowing that if I went in a little too far I was going to be screwed because the adapter would then thread in all the way without every really getting tight. Thank god, it seemed to work.
While this was going on I ordered an oil pan baffle from TC Motorsports. It looks nice. I’ll probably take one of the other spare oil pans, have the baffle and the bung installed and have it ready for the next time I take off the oil pan.
Installing an oil pan with a crankscraper is always a treat. First you have to go thru some test fits and grinds so that the scraper will clear the oil pump and the crank counterweights. This takes a while because you have to “locate” the scraper each time with at least 8-10 bolts otherwise it won’t go back on exactly the way it did before. Once you are finally happy with the fit, you have to put goobage on the scraper and fasten it in place with all 40 bolts. Or was it 60? Then you walk away and let the gasket goobage dry over night.
If you did a good job above, when you remove the 60 oil pan bolts, the scraper won’t fall on your face while you install the oil pan. But if you’re an idiot you’ll find that the reason you can’t seem to install the oil pan is that you only removed 56 of the oil pan bolts so that’s why 4 of them won’t go in. If you are a complete and utter moron you will do this a second time having removed 58 bolts, and not get it right until the third time.
I’m anal leaking oil pans so I carefully cleaned all bolt holes with acetone and a brush from a rifle cleaning kit. I used a thick paper gasket that IMO seals a lot better than thin cork gaskets. Then using clean bolts and blue locktite and installed each one with an in-lb torque wrench. The bolts going into aluminum were torqued to spec and the bolts going into steel went a little tighter.
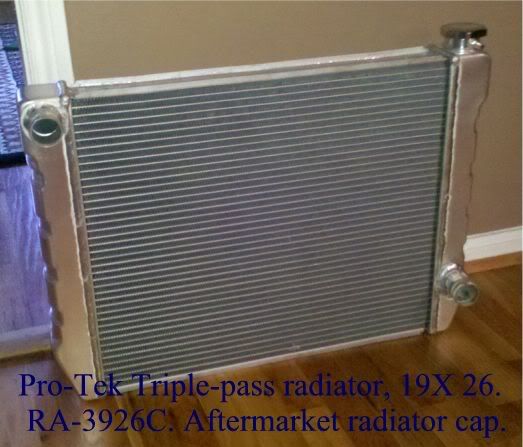
The saga of the radiator.
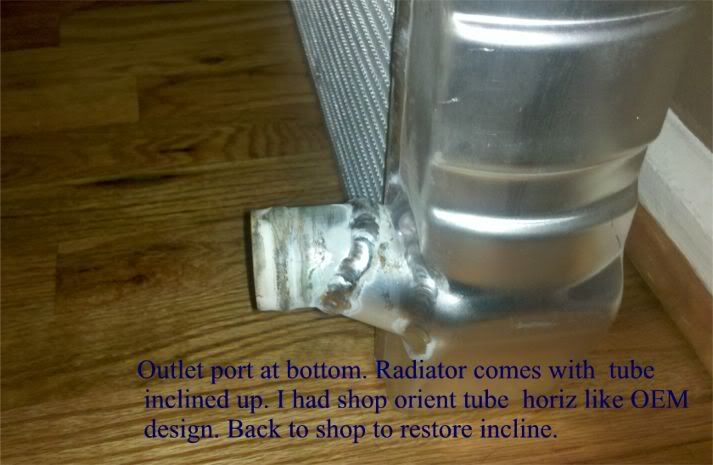
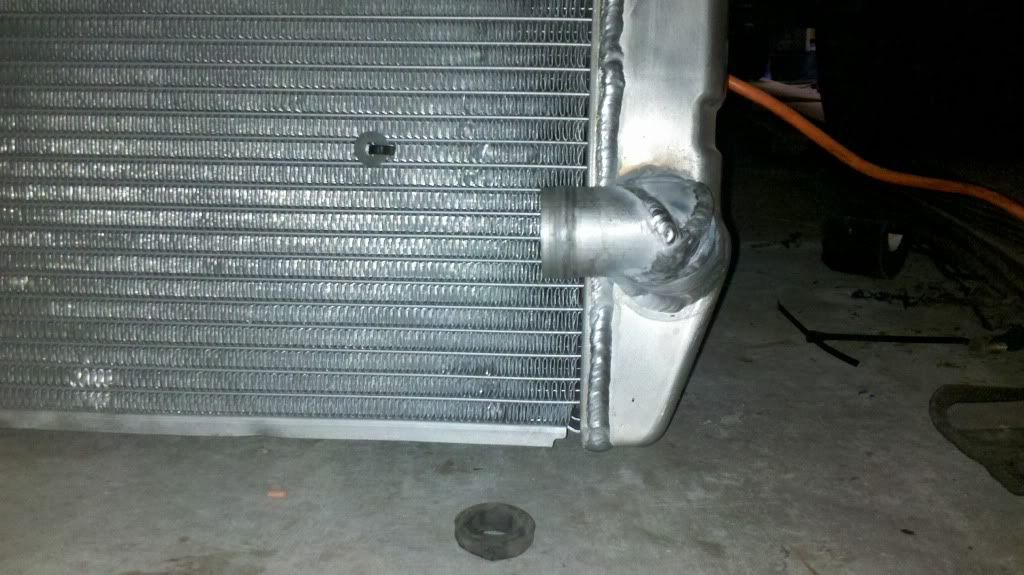
I had a lot of trouble installing the triple pass radiator. Recall that it uses a return tube that is too large so I’d had it replaced with a smaller dia. tube. Cleverly, I had the smaller tube pointed horiz rearward instead of pointing up a bit like the earlier radiators. I figured that would make it easier to connect a hose to the cross tube. Nope. I tried for quite a while to get a hose to work, but in the end I decided my idea for pointing the tube rearward had been a bad idea and it needed to go back for a redo.
The next evening I spent 2hrs at the welding shop as we fabricated a tight 90deg turn in the return tube. Not until halfway thru that effort did I figure out that 1) The reason I was having problems with the return (bottom) tube is that it’s about 2" higher in this brand radiator than the radiators I’d used previously. And 2) It’d be a helova lot easier to modify the coolant tube that goes across the front of the engine than the radiator return port that connects to it. But I was committed so I sucked it up.
Radiator Return Pipe, 2nd Design
With all of the work done on the radiator, my bargain solution saved no money. It’d cost me a fortune if the old guy at the machine shop charged me what he should have.
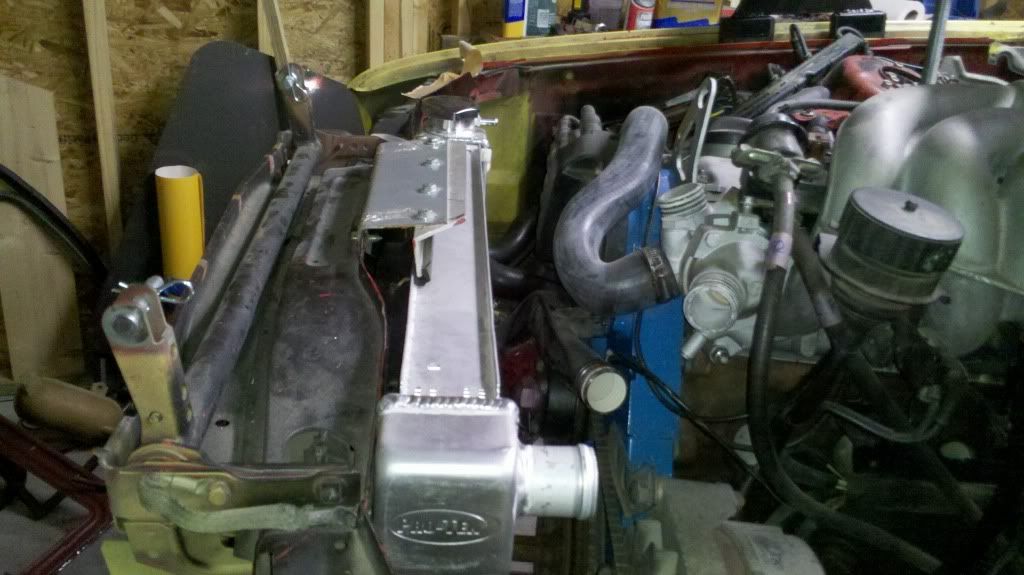
After getting the radiator modified I pressed on with the install into the car and ultimately got the hose routing to reasonably fit. And after some cut/fit cut/fit imagineering cycles my fastening clamp hardware seemed to hold the radiator in well enough.
Radiator, Installed.
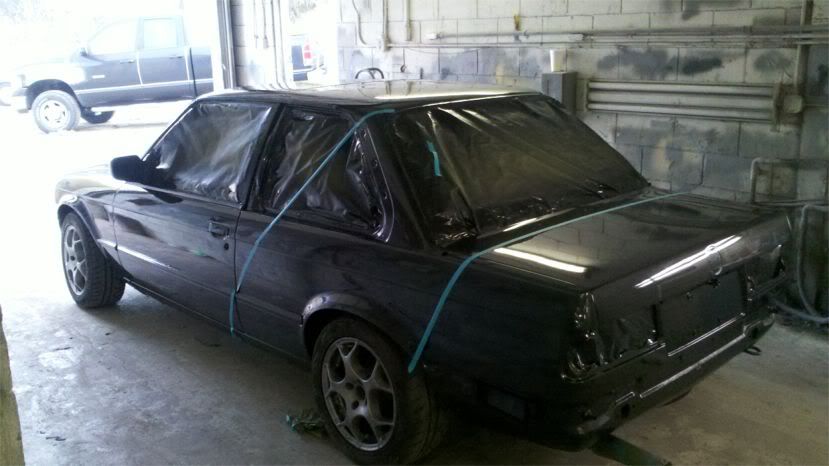
The saga of the paint job.
I had some Bondo on top of the car where the holes had been cut thru and I’d had to weld in patches, and some more on the RR quarter panel. I don’t have much experience with body work but after a couple iterations with Bondo and after buying a dual action sander I got roof in decent condition. I didn’t end up really finishing the RR quarter panel. After a couple layers of Bondo and sanding I figured MAACO could give it 20min and it’d look a lot better than my effort.
The car was originally Cinnabar Red but had been painted an awful yellow color. Because it was peeling a little in a couple places, and a great big sheet of yellow paint had come off of the hood when I removed a big decal, I decided to remove all the yellow paint. I was concerned that if MAACO painted over the yellow, I’d put a decal on and then upon removal the decal would take 2 layers of paint with it. So over the course of 3 days I spent 7-8hrs covered in yellow dust sanding away with the new dual action sander. I used a pretty harsh grit, thinking that when MAACO went over it with their 180 (or whatever) that they use for paint prep, that would nicely smooth out what I was doing with 60grit. As usual, this all turned out to be an expensive mistake.
All that yellow paint turned out to be pretty tenacious so maybe my worries about it coming off were baseless. And MAACO took one look at my 60grit sanding job and said “uh oh”. “That will look awful if we just do a sand and paint. We’re going to need to do an extra sanding effort, then we’re going to have to hit it with a special “high build’ paint. Then we’ll do your paint. Also, they wanted another $120 to do the Bondo work that I’d thought would take only 20min. The consequence of all of this was that I’d just doubled the cost of the paint job to almost $1k. if, instead I’d just feathered the paint where it had come off and finished the bondo work on the RR quarter, I’d a saved myself $500. Doom on me.
Misc
The night I got in trouble over noise I started looking for a useful task that would be quiet. So I did a valve adjustment. All the exhaust valves were too tight and all the intakes were around the OEM spec, which is a little loose IMO. I didn’t spend the time getting everything perfect but I did redo about half of the valves that were the most egregious.
I noted that the rocker arm eccentric nuts were a bit tighter than they should have been. This was a surprise since virtually every fastener I’ve touched so far has been loose. The one that got my attention that night was the loose Jesus nut on the front of the crank. A loose Jesus nut on the front of the crank is a little spooky. The loose fasteners that got my attention last night were loose motor mounts, tranny mounts and all oil pan bolts. Every single oil pan bolt wasn’t torqued down to spec.