Engine swap <yawn> and data logger hp


#21

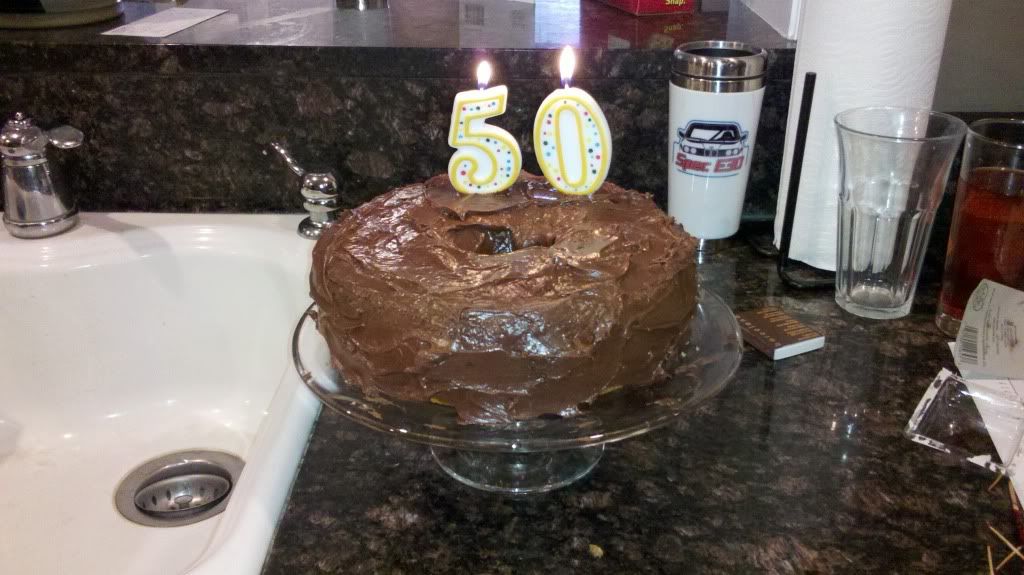
What I wouldn’t give to be 30 again. Well, I wasn’t very bright when I was 30 so I have become less stupid. It’d be a helova combination tho to be 30 again and also less stupid.

My first effort was to get the early/late water pump adapter installed while the engine was still out and I had easy access to everything. The early model pump has a port that goes to the coolant reservior. We’ll call that the “early port”. The late model pump doesn’t have the port but does have a fastening point for late model coolant tube that goes across the front of the engine. We’ll call that the “late pump fastening point”. My aftermarket radiator needs the late tube so I wanted that fastening point. Therefore I needed a hose adapter so my late pump could have an early port.

Late pump with it’s fastening point, sitting next to the adapter that provides the “early port”.
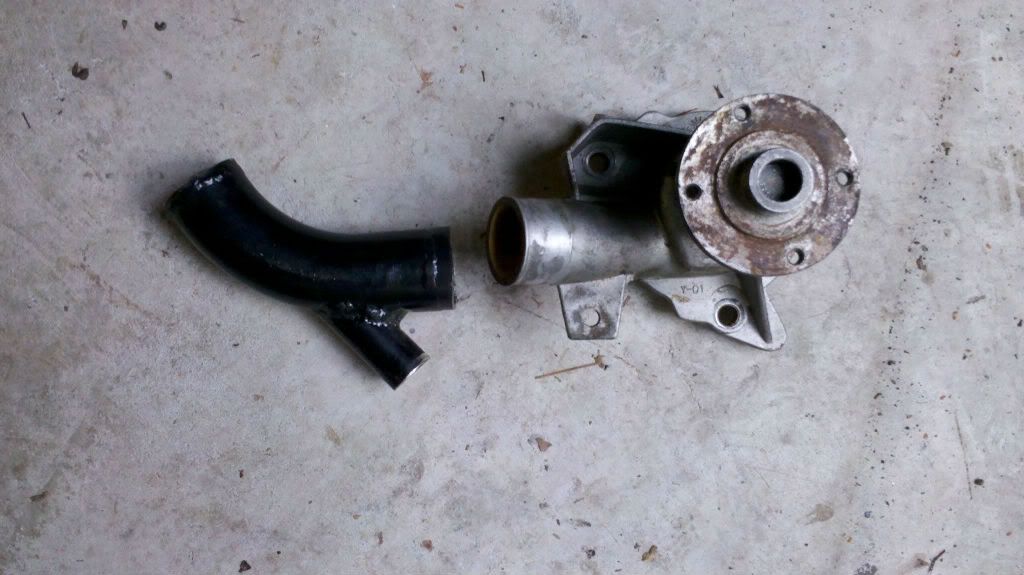
My last adapter was crushed in the crash but Chuck Baader made me another. The problem was I couldn’t quite get it to work. After cutting it down a bunch, doing a bunch of twisting so test fits indicated that the distributor cap would clear it, what kicked my ass was the hose to the thermostat housing. For money or love I just couldn’t get it on to the adapter. Soon it was 9:30PM and I’d really not completed a single useful task in what was becoming a serious time crunch effort. I decided that I needed to step back and reconsider this.

–I could convert to a late coolant system by swapping out thermostat housings and modifying it to work.
–I could convert to an complete early cooling system by swapping water pumps and sucking up the fact that the late steel cooling tube would be poorly attached.
–I could think out of the box.

I got out of the box. I tried to understand just how our coolant reservior bottle worked. It’s the highest point in the system, it’s at more-or-less a pressure equilibrium with the radiator, and it has a pressure relieve valve for overflow. What would happen if I tried to run the weekend without it? My after market radiator is pretty tall so it would be the highest point. It will happily take a conventional pressure relief valve radiator cap so that’s taken care of…Hmmm. It might just work. So that’s what I’m going to try to do. I won’t connect the coolant overflow bottle for the weekend and we’ll see what happens. I’ll bring some hoses and stuff to the track just in case it turns out to be a bad idea.

Half of the night was gone forever,and I’d not done a damned thing. But the problems were just starting.

I couldn’t get the damned motor mounts in to save my life. One of the charms of OEM motormounts is that they have a stud coming out of both sides. That kind of motor mount can help you get the engine to make it the last 2" of “there, it’s in place”. But my motor mounts have a single bolt that goes thru so instead of the mount mount helping, it makes getting the engine the last 2" of in place harder. To make things worse, the exhaust downtubes were hung on the new sway bar and pressing up on the exhaust manifold studs.

As a result, the closer I got the engine to being exactly in place, the more the exhaust downtubes worked to prevent me from moving the motor.

After fighting it a while I decided that there was no way I was going to get this done unless my cheap old Harbor Freight hoist could go farther forward. So I removed my air dam and front bumper in order to win 4". I’m not quite sure how I was able to do this all the other times w/o removing the front bumper, but this time is was not going to work.

I drove on trying to get the motormounts to line up. After failing for a while, I decided that it might help if I got the tranny cross bar in place so the engine would be closer to the right angle. So alternately raising the car’s lift and raising the engine hoist a couple inches at a time until the car lift got to the first safety catch, I lifted the car up 18" or so. Then I got under the car and spent 20min benchpressing the tranny with one hand while I fastened the tranny brace cross-piece in place.

That done I went back and fought the motor mounts a while longer and by 11PM had them both in place. By midnight I had removed the tranny brace that I’d installed backwards and put it on correctly, with the tranny mounts this time. All requiring lots more bench pressing of the tranny. I also connected the shift linkage.

At midnight I was fastening up the clutch slave when, to my horrer, it slipped in with no resistance. The slave piston rod didn’t seem to be pushing on anything. I layed there under the car for a couple minutes trying to understand what might have gone wrong with my clutch, pivot pin, fork, and throwout bearing install. I couldn’t come up with a way I could have screwed it up. There aren’t enough parts to forget something and you can’t do any of that stuff backwards, so what could I have screwed up? The idea of pulling the engine out again and separating tranny from engine was too painful to bear. I decided to go ahead and fasten up the slave and then see if I had resistance at the clutch pedal.

And I did. So maybe it’s ok.
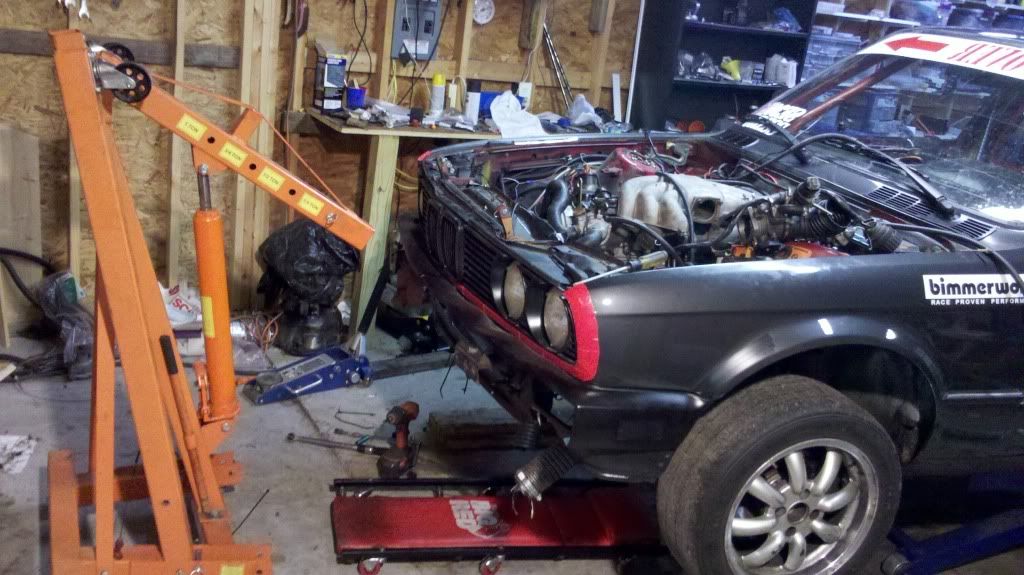
Filthy and exhausted I shut down the effort at 12:30, had a beer, checked out the forums, watched some of the Rolex NJ recording and then took a shower with a stiff scrub brush.


#22

Scott, you have to cut the piece I made and the hoses to get it to work together. You have cut the metal piece too much at this point. You need about another inch on the two lower ends.

Fifty…damn I remember it well, at least I think I do.Cb


#23

[quote=“cwbaader” post=66656]Scott, you have to cut the piece I made and the hoses to get it to work together. You have cut the metal piece too much at this point. You need about another inch on the two lower ends.
[/quote] I actually ended up cutting the adapter a little more. It was a hose diameter problem that did me in.


#24

Ha! You guys are so doomed. You’ve not a prayer against engine #8a. Not a chance.

I came home early from work to get a jump on things. Everything is now hooked up except for coolant and driveshaft (I think). I put on an old oil filter and put some old oil in. I pulled the fuel pump relay. I just wanted to turn the motor over a bit to prime the oiling system.

I ran the starter and after a couple of seconds, to my surprise the car started. I shut it off immd and confirmed that I had the fuel lines connected correctly. Then I turned the car on again, confirmed that I had 0 fuel pressure, and hit the starter again. The car started, and I turned it off.

You guys are screwed. My engine is so fierce it pulls go-juice right out of thin air. It burns Luminiferous Ether

Gotta go run and make dinner.


#25

Glad to hear it fired up! We are 100% loaded and headed to GA in 7 hours. Moving sucks, but I’m excited about living in Georgia again!


#26

Welcome back to the sunny south!!! Chuck


#27

[quote=“Ranger” post=66660]Ha! You guys are so doomed. You’ve not a prayer against engine #8a. Not a chance.

I came home early from work to get a jump on things. Everything is now hooked up except for coolant and driveshaft (I think). I put on an old oil filter and put some old oil in. I pulled the fuel pump relay. I just wanted to turn the motor over a bit to prime the oiling system.

I ran the starter and after a couple of seconds, to my surprise the car started. I shut it off immd and confirmed that I had the fuel lines connected correctly. Then I turned the car on again, confirmed that I had 0 fuel pressure, and hit the starter again. The car started, and I turned it off.

You guys are screwed. My engine is so fierce it pulls go-juice right out of thin air. It burns Luminiferous Ether

Gotta go run and make dinner.[/quote]

Later. I was at it until 02 last night but it’s about done.

I put the ignition distributer cap on and didn’t notice that I’d cleverly pinched the plug 6 wire “sensor” under the rocker arm cover. That would play later.

Setting up the coolant system. Now that my front steel coolant pipe is properly fastened, the piece of hose that used to run from it to the bottom of the aftermarket radiator didn’t fit very well. I spent an hour screwing with the hose, deciding I needed to “make” another hose, making the new cut piece of hose gradually too damned short, and finally going back to the original hose and making it work.

You know the coolant drain port that is under the exhaust manifold? In an uncharacteristic move, I checked to see if the plug was in place before filling the radiator and engine block with water. And the drain plug was not in place. What nice confirmation that when I gain experience I screw up less. I put in a plug and filled the system with water and a little Waterwetter. It took ~3gal.

Then I put in 4qts of old discarded oil. The crappy dirty oil will serve to remove all the debris that has snuck into the engine during storage and assembly. I noted that oil was leaking out of the rocker arm cover on the exhaust side so I tighted the nuts down a bit more. Hours later I realized that the reason so much oil had leaked out is that the plug #6 sensor wire had gotten trapped inside. The wire was kind of torn up, but I’ll be goddamned if I’m going to throw away a $130 set of newish Bimmerworld 8mm plug wires unless forced to.

Because the exhaust downtube is being held up by the front sway there’s no clearance to work with between the downtubes and the exhaust manifold studs. Getting them in position to mate up had been tricky. But now I had to do it all over again because I had to get the downtube gaskets in place. That was another pita. But once they were in place the downtube happily fastened up to the manifolds.

Front bumper and air dam went back on next. I need to either extend the range of my hoist or get a bigger one.

The last effort was the driveshaft that I’d mistakenly separated. I had the marking dot on the front half, so all that remained was identifying the dot on the rear half. I spent 30min laying on top of the lift’s hydraulics and safety mechanism, obviously a really bad idea, with my neck crained back and studying the U Joint thru the tunnel of the rear subframe. I could not find a corresponding paint dot and I was starting to worry. No amount of cleaning the end of the driveshaft seemed to making a white dot appear.

I had 3 choices. Either I made this work, or I removed the rear half of the driveshaft and tried to ID the dots and assemble the thing correctly out of the car, and then install it. Or I went up to the attic and got my spare driveshaft and put it in. Shit.

Then I got the idea “what if the rear dot is at the splined end”. This was even harder to get to because I had to crawl into the inner workings of the scissor lift, something I really hate to do. If the HF scissor lift ever failed, under normal circumstances I could kick me and the mechanic’s creeper out in a second. But when I’ve crawled inside of the lift itself, there’s no way I’m getting out in time and at best I’ll lose my legs. 30secs later, I’d be bled out and a gonner.

I crawled inside of the lift and sure enough there was a paint dot on the spline end of the rear driveshaft half. The next problem was to create some separation between car and lift so I’d have more up/down range of motion for the driveshaft. I dropped the car and put 2 thicknesses of 2x4" over each lift “lift point”, and raised the car back up. This made the car kinda rickety on top of the lift, making a bad idea only worse. I crawled back into the lift.

45min later I’d mated the driveshaft halves 3x, the first two of which had to be undone in order to get either driveshaft or center bearing in place. I tell ya, the next time the car is anywhere near Midas, I’m going to have them cut the exhaust and put in some clamps. Having a 1 piece exhaust can be a pita.

Interestingly, I found last week that New #6 has a frame brace that the old car didn’t have. It’s a 2’ long vaguely S shaped piece of steel that goes across the under side of the car near the center bearing and has 6 fastening points. Odd that it wasn’t on the old car. I can sure see how it would help structural rigidity.

Tonight I have to run the car for a while, tighten the headbolts a bit more, then change the oil. Tomorrow, once it’s cooled down, I’ll do a valve adjustment. Barring a goatscrew, like a clutch or HG problem, I’m done. I think.


#28

Thanks Chuck! We’ll be at RA in only 719 more miles!


#29

Uh oh. The clutch isn’t engaging. Pedal goes halfway and then gets hard. Something’s wrong. The tranny has to come out. R/Ring the tranny without a helper is a bastard so my attendence this weekend is iffy. Have everything removed except for the top 2 bolts right now, and they’re giving me a lot of trouble. Am about to lift the motor up pop the mounts out and then drop the motor back down. Hopefully that will give me enough room that I can get to the top 2 bolts.

Sadly, the hard part is going to be mating the tranny back up to the engine. And…what if, once I get the tranny down on the ground, I don’t see a problem. Wouldn’t that be just fine? I mean, heck, all there is in there is the fork, pivot pin and the throw out bearing…what the heck could be wrong?


#30

I got the tranny off. Had to lift the motor off the motormounts, pull them, and then drop it down. Then hustled to Harbor Frieght to get shorter Torx sockets because mine were so tall I had no prayer of going after the top 2 bolts from above. And with no helper, I really needed to get those bolts from above.

The screw up was the thrust bearing. Prior to mating the tranny to engine a couple days ago I checked out the fork, bearing and pivot pin. But when I put them back together I forgot that the thrust bearing has wings that have to be on the fork. I had it rotated 90deg so the fork didn’t have wings to push and the thrust bearing didn’t go far enough forward.

Now the trick is going to be getting the tranny mated back up to the engine without a helper. Gonna be a hard night.


#31

2AM: I’m done. Fastening up the bottom starter bolt gave me the worst problems. We’ll see what happens when I run the car a little tomorrow afternoon. I paid in blood for the event at RA this weekend. If I get there, the beer’s on y’all.


#32

Another item to go into the “things I learned not to do to my car” folder. Chuck


#33

Boys and girls, I’m out fro RA. Sorry. Something is still up with my clutch. After R/Ring it the 2nd time last night and fixing the thrust bearing, I got home this afternoon, started the car and…no clutch.

I have a low profile clutch that is supposed to prefer a slightly taller pivot pin. I ran the clutch all last year with the normal pivot pin and it worked fine. But since the pedal kind of felt like the clutch was engaging, just not far enough, I pulled the tranny this afternoon/evening and put in a taller pivot pin. And it still didn’t work. That’s tranny daily R/R #3.

The slave seems fine. I put it in a bleed fixture and pushed the clutch pedal with my hand. There was so much pressure on the bleed fixture that the slave busted the fixture.

I carefully inspected the fork and thrust bearing, comparing them to new parts in order to detect anything bent.

Once I get emotionally recharge I’m just going to replace the goddamned clutch, and maybe the slave for good measure.

When I started this thread the was supposed to represent the engine swap as a “routine” effort. Having been up well past midnight every night of this effort, would mean weariness…if I wasn’t so pissed off.


#34

Dude.
Nuff said


#35

I’m confused. Was the clutch not engaging (slipping) or not disengaging? A problem with clutch engagement would pretty much have to be caused by the clutch itself. But a failure to disengage could be a problem with the clutch fork, clutch hydraulics, or the pressure plate. I’d certainly investigate the hydraulics first. If no leaks at the slave or lines and no air in the system, replace the master cylinder.


#36

Definitely +1 on hydraulics. I would suspect the slave cylinder since you probably over extended it when you had the T/O bearing improperly installed. It was a working clutch before you started the motor swap, right? Chuck


#37

It’s hard to accept that it’s a problem with clutch hydraulics. What’s changed is that I’m attempting to put in the low profile clutch from Old #6. The master and slave are unchanged. The slave is only a month old and was strong enough to bend my slave bleed fixture.

It’s still screwed up btw. I R/R’d the tranny again yesterday and put in the taller thrust bearing from Old #6, but was unalbe to really test it until today because of “quiet hours”. The family was away all day so I couldn’t test it until a couple hrs ago. The slave is engaging but the pedal feels a bit low on spring tension. And the clutch is not disengaging.

I’ve now R/R’d the tranny 4x. I’m kind of demoralized. Maybe this particular model of clutch slave doesn’t adapt in some way to extend as far as my old one. I think I might fab a longer slave piston “rod”, and if that doesn’t work either I’ll pop a thermite grenade on the thing, or I’ll lose the low profile clutch.


#38

Remove the rod from the existing slave cylinder. Make a new rod (longer in length) from a Phillips head screwdriver.Install rod into slave/into clutch arm and check for clutch engagement/release.

Ask me how I know about this trick.

RP

Sorry for all of your problems. You were missed at RA.


#39

Second solution…take current rod from slave, take another rod from another slave. Cut one short, one longer and weld together for proper clutch disengagement. As per RP, don’t ask. CB


#40

Chuck, I’m missing something here. You’re telling me that this is a better solution than a generic shaft but I don’t understand why it is.